
Price Action Entry Triggers and Confluence
JustWolves is an educational platform and is not a SEBI-registered investment advisor. Trading financial instruments involves significant risk of loss and may not be suitable for all investors. Past performance is not indicative of future results. Read our full disclaimer →
What you'll learn
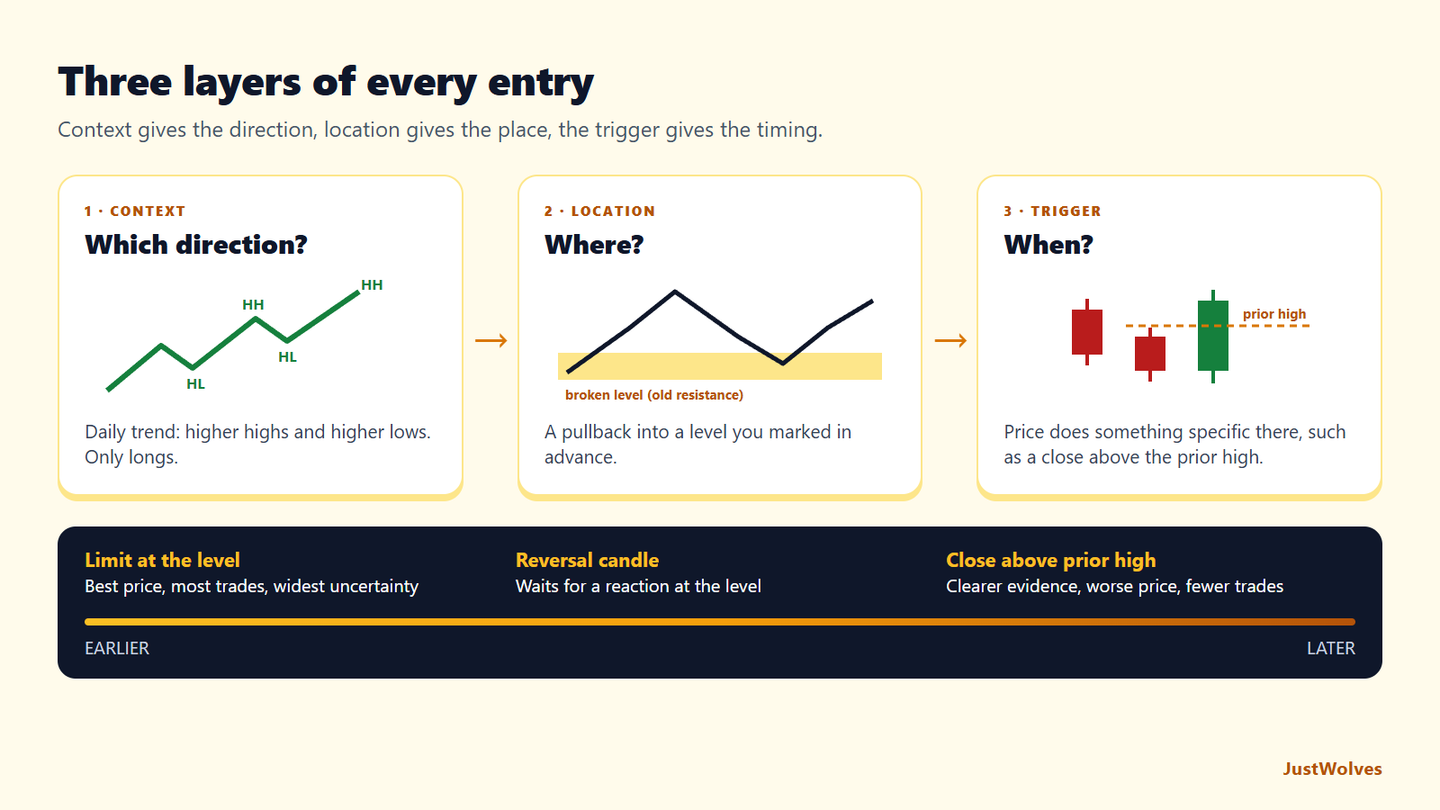
- A trade has three layers: context (trend), location (level) and trigger (what price does there)
- Common triggers: a reversal candle, a lower-timeframe break of structure, and a breakout and retest
- Confluence means independent reasons agreeing on one area, not several versions of the same reason
- Market, limit and stop orders each suit different triggers
- Write your trigger rules in advance, so the decision at the level is mechanical
In this article · 16 sections
By this point in the course, you can read trends, mark levels and recognise patterns. The remaining question is when exactly to press the button. Entering too early means stopping out before the move; entering too late means a poor price and a wide stop. This lesson separates the setup from the trigger, covers the common price action triggers, and shows how to build confluence that actually adds information.
What You Will Learn
- The difference between context, location and trigger
- The common price action entry triggers
- How to build genuine confluence
- Which order types fit which triggers
Before You Start
Read Continuation Patterns and Price Rejection first.
Context, Location, Trigger
| Layer | Question | Example |
|---|---|---|
| Context | Which direction do I want to trade? | Daily uptrend: higher highs and higher lows |
| Location | Where would a trade make sense? | A pullback to prior resistance, now support |
| Trigger | What must price do there before I enter? | A bullish engulfing candle closes in the zone |
Most poor entries come from skipping a layer: a trigger with no location (a nice candle in the middle of nowhere), or a location with no trigger (buying a level just because price reached it).
Common Triggers
- Reversal candle: a pin bar, engulfing candle or strong close at the level. Simple and widely used; the stop goes beyond the candle.
- Lower-timeframe break of structure: at a daily level, drop to the hourly or 15-minute chart and wait for price to break a minor swing in your direction. Often gives a tighter stop.
- Breakout and retest: price closes beyond a level, returns to it, and holds. Slower, but with clear invalidation.
- Failed breakout: price breaks a level against your bias and closes back inside, trapping the breakout traders.
Real Case: Two Triggers at One Level
The chart below uses real daily candles for State Bank of India from August and September 2025. It shows the same location traded with two different triggers from this lesson: an early limit order at the level, and a later close above the previous day's high. Step through it and compare the price, the stop and how long each trade had to wait.
Real case: two triggers at the same level, SBI, August–September 2025
Step 1 of 5
Context and location
SBI is in a daily uptrend above a rising 50-day average. A swing high at 803.8 from 31 July broke in August, and price made a high at 838. The broken high, drawn as a zone of about 1% either side, is the location to watch.
- What to observe
- Trend up; a role-reversal level below price.
- Condition
- Wait for the pullback.
Building Genuine Confluence
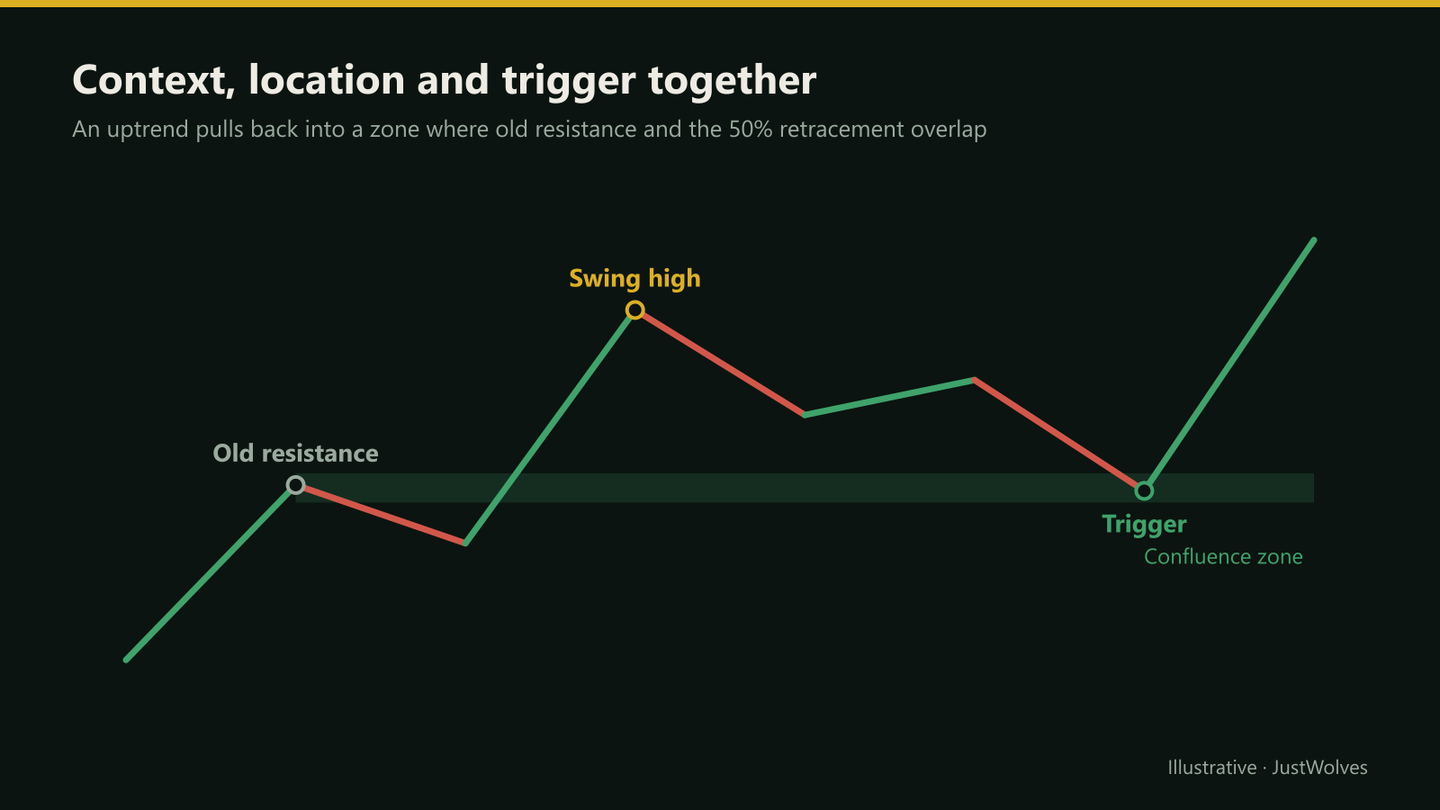
Confluence is when independent pieces of evidence point to the same area. A prior resistance level, a 50% retracement and a rising 50-day moving average all landing near one price are three different ways of reaching the same conclusion.
Adding RSI, Stochastic and MACD, by contrast, adds three versions of the same thing, momentum, all calculated from the same closing prices. That isn't confluence; it's repetition.
Choosing an Order Type
| Order | How it works | Fits |
|---|---|---|
| Market | Fills immediately at the current price | Entering on the close of a trigger candle |
| Limit | Fills only at your price or better | Entering at a zone in advance; may not fill |
| Stop (buy-stop / sell-stop) | Fills once price moves through your level | Entering on a break of the trigger candle's high or low |
Early Versus Late Triggers
Every trigger is a trade-off between price and evidence. An early trigger, such as a limit order resting in the zone, gives the best price and the tightest stop but takes many trades that never turn. A late trigger, such as waiting for a breakout and retest of a minor high, filters out more failures but enters at a worse price, so each winner is smaller in R.
Neither end is correct for everyone. Traders who can tolerate frequent small losses often prefer earlier triggers; those who find a run of stop-outs hard to handle often prefer later ones. What matters is choosing one deliberately, writing it down and testing it.
Do Triggers Matter? Our Test
This lesson's practical exercise asks you to compare triggers at the same location. JustWolves did that mechanically on about six months of real 1H candles for NIFTY 50, EUR/USD, GBP/USD, USD/JPY and gold, with short setups tested on mirrored prices.
Location: a swing high broken by a close, in an uptrend (price above a rising 50-candle average), on the first pullback back to it. Triggers: (A) a limit order at the level, with the stop below a zone three quarters of an average candle deep; (B) a bullish candle closing in the top third of its range within six candles; (C) a close above the previous candle's high within six candles, with the stop below the pullback low. Every trade targeted 2R. A target touched in the same candle as the fill was not counted.
| Trigger | Trades | Share of setups | Winners | Average per trade |
|---|---|---|---|---|
| A: limit at the level | 335 | 92% | 32% | −0.04R |
| B: reversal candle | 225 | 62% | 26% | −0.21R |
| C: close above the previous high | 185 | 51% | 31% | −0.06R |
None of the three triggers made money on average with this location alone, and none was clearly better than the others. The limit order traded almost every setup at the best price; the later triggers skipped about half the setups but did not improve the result enough to matter. The reversal candle did worst.
We also checked confluence. Limit trades where the 20-period EMA sat within half an average candle of the level averaged −0.08R over 49 trades, against −0.03R over 286 trades without it: no improvement from adding a moving average.
The practical lesson matches the advice in this lesson's callout. The trigger mostly changes your entry price, stop size and number of trades. Whether a setup is worth taking depends on the context, the location and the reward available, so spend your effort there, pick one trigger, and keep it consistent so your results are comparable.
Practical Example
Hypothetically, Nifty is in a daily uptrend. Old resistance at 24,480–24,520 broke two weeks ago, and the 50% retracement of the latest rally is 24,500. Context and location are in place.
Price pulls back to 24,505. On the 15-minute chart, it breaks a minor swing high at 24,560. Pooja buys Nifty futures at 24,565 with a stop at 24,470, below the zone, targeting the swing high at 24,850: 95 points of risk for 285 points of reward.
Practise on a Real Chart
The chart below is real NIFTY 50 hourly data. Find three pullbacks to a broken swing high. For each one, write down where a limit order would have filled, where a reversal candle formed, and where price first closed above the previous candle's high. Compare the entry prices and the stop distances. You will see the trade-off between price and evidence very quickly.
Practice chart: NIFTY 50 hourly
Loading historical candles…
Common Mistakes
- Triggers without location.
- Changing the trigger mid-trade to justify an entry.
- Counting correlated indicators as confluence.
- Using limit orders against strong momentum, where fills tend to happen on the trades that fail.
- No written rule, so the trigger changes with mood.
Professional Insight
Many professional traders use a single trigger type for each setup and review it in their journal. That consistency is what makes it possible to tell, after fifty trades, whether the trigger helps or not.
Risk Considerations
- Earlier triggers have tighter stops but more false signals.
- Slippage affects stop orders in fast markets.
- Missed trades are a normal cost of waiting for a trigger.
Important Terminology
| Term | Meaning |
|---|---|
| Context | The trend or bias that sets trade direction. |
| Location | The level or zone where a trade makes sense. |
| Trigger | The price behaviour that times the entry. |
| Confluence | Independent evidence agreeing on one area. |
| Stop order | An order that fills when price moves through a level. |
What is an entry trigger in trading?
The specific price behaviour, such as a reversal candle or a lower-timeframe break, that must happen at your level before you enter.
What is confluence in price action?
Several independent factors, such as a level, a retracement and a moving average, pointing to the same price area.
Which entry trigger is best?
None is best overall. In our test on real 1H data across five markets, a limit at the level, a reversal candle and a close above the previous high all came out close to break-even or worse at the same setups. Earlier triggers give tighter stops and more false signals; later ones give better confirmation at a worse price.
Should I use limit or market orders?
Limit orders suit pre-planned zone entries but may not fill; market orders suit entering on a candle close.
How many confluence factors do I need?
Trend, level and trigger are the core. One extra independent factor can help; more rarely does.
Does adding a moving average to a level improve entries?
Not in our data. Limit entries at levels with the 20 EMA nearby did no better than entries at levels without it.
Practical Exercise
Compare two triggers.
Your task
Step 1: Pick one setup
For example, pullbacks to prior resistance in daily uptrends.
Step 2: Find twenty examples
On past charts.
Step 3: Apply two triggers
A reversal candle versus a 15-minute break of structure.
Step 4: Compare
Stop size, fill rate and outcome for each.
Check Your Understanding
Which layer answers 'where'?
Related Lessons
Previous: Continuation Patterns. Next: Best Indicators for Price Action Traders. See also Risk-Reward Ratio.